Cloning hard drive is to copy all contents from one hard disk to another. Different from manual copy and paste, this method is to create a 1-to-1 copy of a hard drive (HDD, SSD or other types of storage device), not just its files. It is a great way for disk replacement and upgrade. In most cases, users decide to clone hard drive to SSD drive. Why?
Although SSD is more expensive than HDD with the same capacity, it is much faster in write and read speed (if you need, you can test SSD drive speed with professional tools), and less prone to damage since it does not contain any moving internal and stores data in microchips. So, if your computer is running slow on a traditional HDD, cloning it to SSD drive for a upgrade can give your computer a fresh life.
Steps to clone hard drive to SSD in Windows 11, 10, 8, 7
To clone hard drive to SSD, you have to go through 3 stages: make preparations, start cloning, and make computer from new SSD drive. Now, let’s walk you through all stages.
Must-to-do before cloning disk to SSD
1. Connect/Install the SSD drive
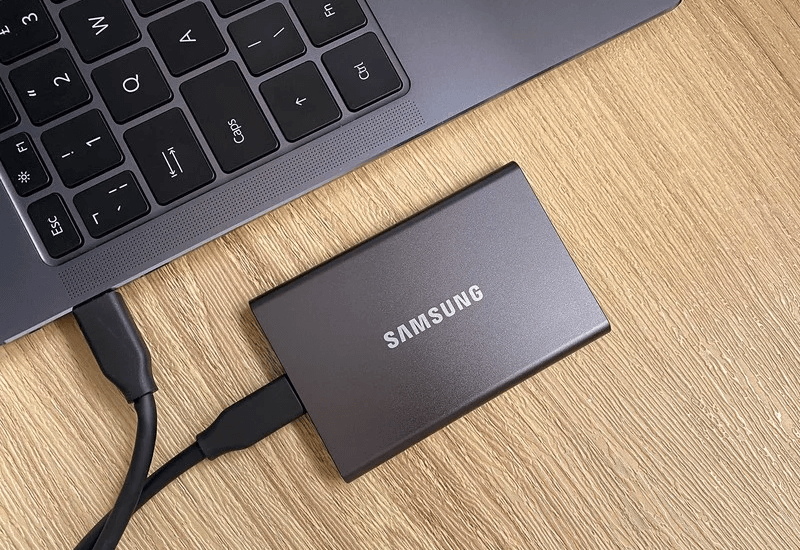
In the first of the place, you’ll obviously need to connect the destination SSD drive to your computer. On a desktop that has enough drive bays, you can install the SSD internally. However, on a laptop with only one drive bay, it is a little complex since you have to make use of an external SATA-to-USB adapte to connect the SSD as a USB external drive.
2. Check the available space of SSD drive
Check whether SSD space can contain all contents of the source hard drive. If not, you might need to delete unnecessary data from the source disk beforehand.
3. Check the partition style of the SSD drive
When cloning boot hard drive to SSD drive, another important task is to check the SSD’s partition style (MBR or GPT), which may decide if your computer can boot from the SSD afterwards after clone. Because the partition style has to be compatible with the boot mode the PC is using now (MBR for Legacy BIOS and GPT for UEFI). When necessary, you have to convert MBR/GPT or change boot mode.
4. Make a backup
Back up everything you need on the SSD drive since all data will be overwritten during the cloning process.
5. Pick up a reliable disk cloning software
At last, you should choose a reliable disk cloning software, which can completely and safely clone hard drive data to SSD without damaging anything. For this, the windows 10 partition manager named AOMEI Partition Assistant Professional is worth trying. Its “Disk Clone Wizard” feature can help clone large hard drive to smaller SSD, also clone smaller hard drive to a larger one. Besides, its intuitive interface makes the entire process easy to finish.
Start cloning now
After the above preparation work, now it’s time to clone hard drive to SSD via the recommended software.
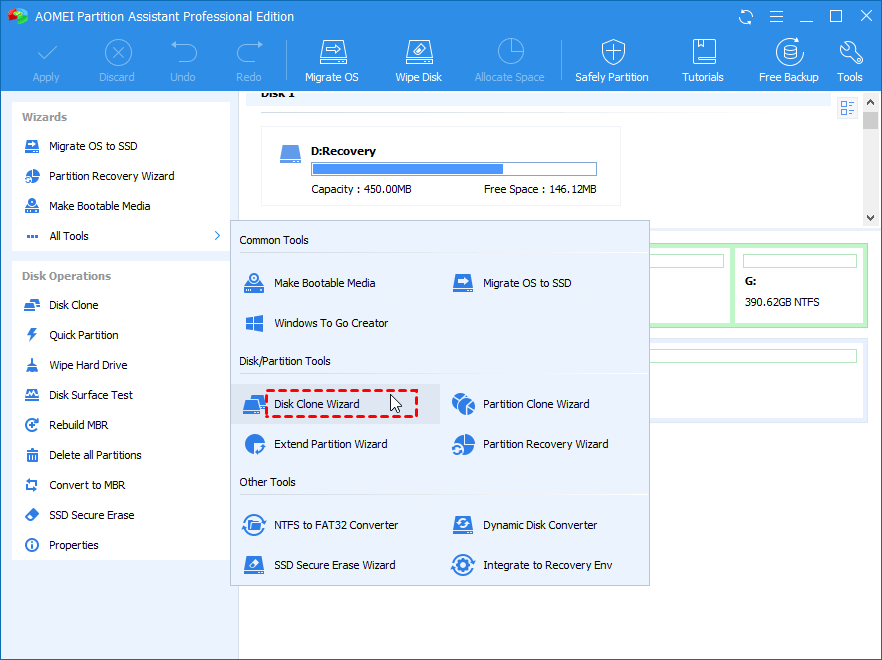
Step 1. Run AOMEI Partition Assistant. Click “All Tools” > “Disk Clone Wizard”.
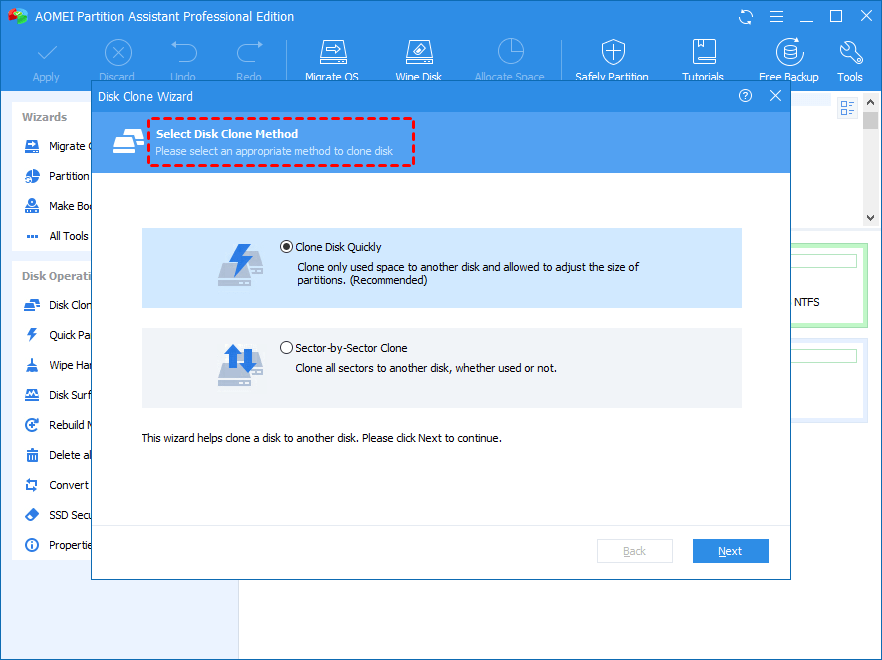
Step 2. Select a disk clone methods from the given options. Here we choose “Clone Disk Quickly”.
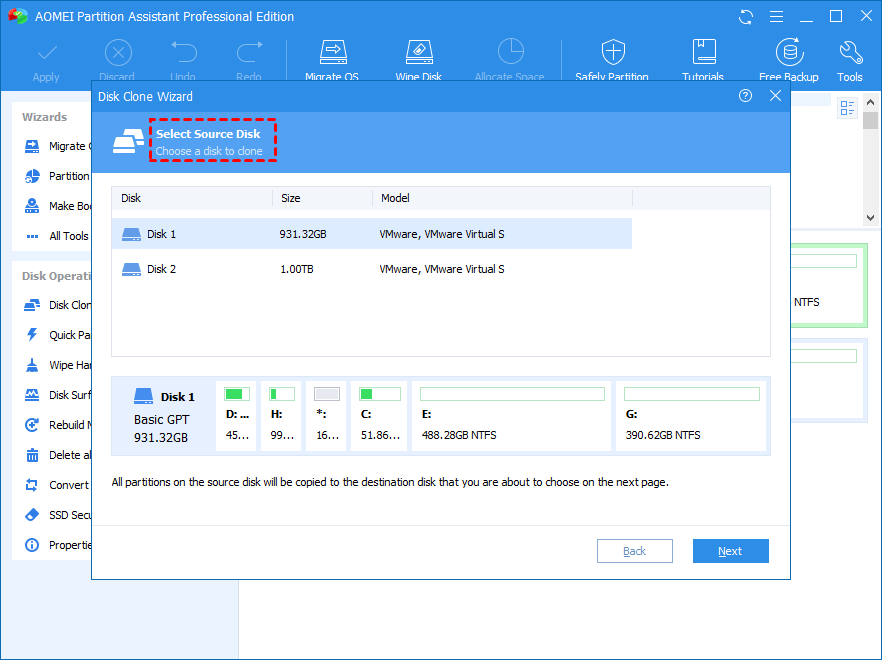
Step 3. Choose the source disk and click on “Next”.
Step 4. Select the SSD as the destination disk and click on “Next”. (PS.: you can tick the “Optimize the performance of SSD” to align partitions)
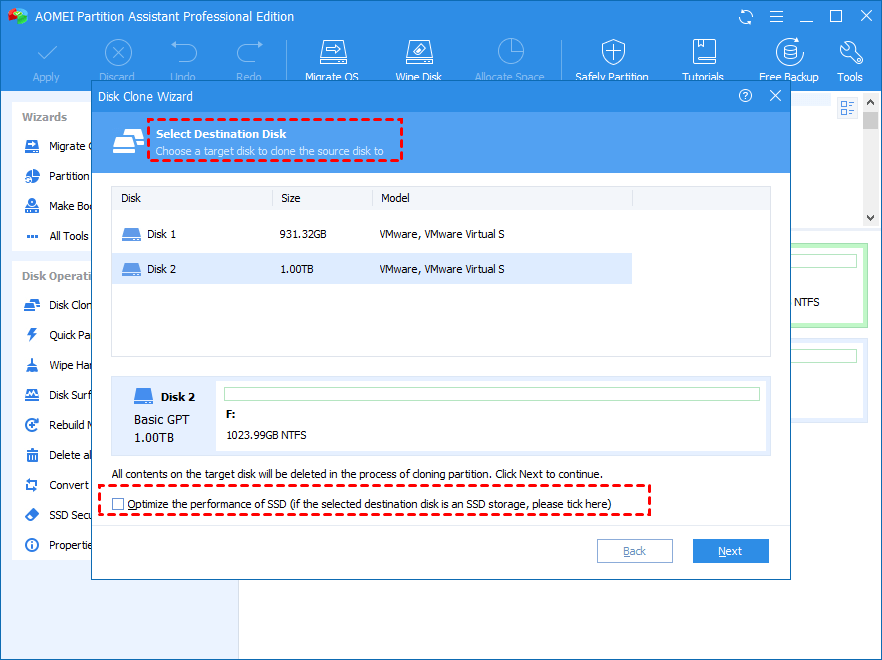
Step 5. You can adjust partitions on the SSD drive as you need.

Step 6. Finally, click “Apply” and “Proceed” to commit the pending operation.

Almost done
When the cloning process is done, now you can restart your computer, enter BIOS mode to change boot order (make the SSD drive as the first boot device) and your computer will boot from it successfully. If everything works well on the destination SSD drive, you can disconnect the SSD and install the drive internally.


